Art for Wellness
Scribble Drawings
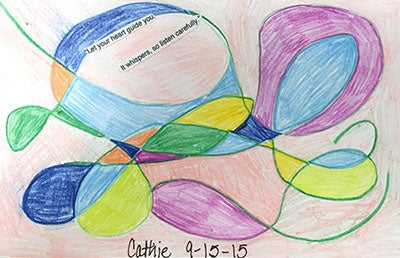
Scribble drawings are fun, easy and relaxing for both adults and children. They are great to do together as a family, but also offer great benefit for those scribbling alone. During these uncertain times, when many are feeling isolated, anxious and/or afraid, scribbling is a simple way to center oneself and focus on the here and now. Because there is no right or wrong way, scribble art empowers everyone to just let go and create. Creative activities foster positivity. They offer new ideas and ways of thinking. Making art has calming effects on the brain and the body.
Supplies:
- Paper
- Pencil/Pen
- Other drawing media –markers, colored pencils, crayons, pastels,
- Paint – acrylic on canvas would probably be best because it’s thick and therefore easily controlled. But maybe you want your colors to run into each other and go out of the lines. If this is the case, go for watercolors!
Instructions: (If you want to begin immediately with the scribble skip to Step 4.)
- Gather your supplies before you begin so you don’t need to get up, which is a distraction from the calming and meditative aspect of the art making.
- Setting – get comfortable, preferably at a table. It’s it is also fine to sit on a pillow on the floor with a hard surface for scribbling on in your lap and surrounded by your supplies.
- When you’re settled and ready to being, start by closing your eyes (if you’re comfortable, otherwise keep them open) and take a deep, slow breath. Feel yourself beginning to relax. Do it again. (If you want to incorporate a full meditation into your scribble experience, now is the time. But it’s not necessary. This is YOUR scribble and whatever is most comfortable for you is how you proceed.) After at least three deep in and out breaths, open your eyes and reach for your paper and drawing utensil.
- Place your marker, or whatever drawing tool you chose, on your paper and just start moving the marker. Go with your “gut.” Keep drawing your scribble until your intuition tells you to stop.
- Now begin coloring the spaces inside and if you want outside of your scribble.
- When you finish your scribble, one fun thing to do is look at it from all angles. Your scribbles will speak to you if you let them. What do you see? Is there a particular object or message within your scribble? For example, people may see the shape of an animal, flower or personal item.
- Give your scribble a name, date and signature. Sign it however you want, for example with your full name, initials, nick name or whatever feels comfortable.
- If you’re in a group, you can share your scribbles and what they mean to you. Or, express how it was to create the art. How do you feel after making the art. It’s very important to respect everyone’s privacy. Never force anyone to share if they don’t feel comfortable. And, never judge the art.

Put your scribbles up where you can see them. Or, if private, tuck them in a journal or nightstand. Families can put them up on a wall together and stand back and look at them as a whole. This is a great communication tool. You can arrange them like a collage and see them as family art.
Most important: Relax, open your mind to the healing qualities of the art making, let your creative juices flow and have fun!
***A variation for families:
Scribble Swap
A very fun family activity for children and adults that will foster communication, exchange of ideas and bring you together.
Instructions:
Draw a quick scribble on your paper. Now pass your scribble to the person next to you. Take the scribble that you received and develop it into a picture.
Therapeutic value: The challenge of developing someone else’s scribble into your own design can stimulate expressing oneself, listening to each other and sharing the creation of art.
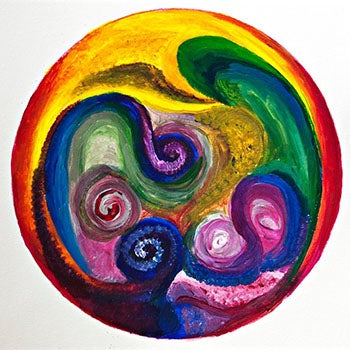
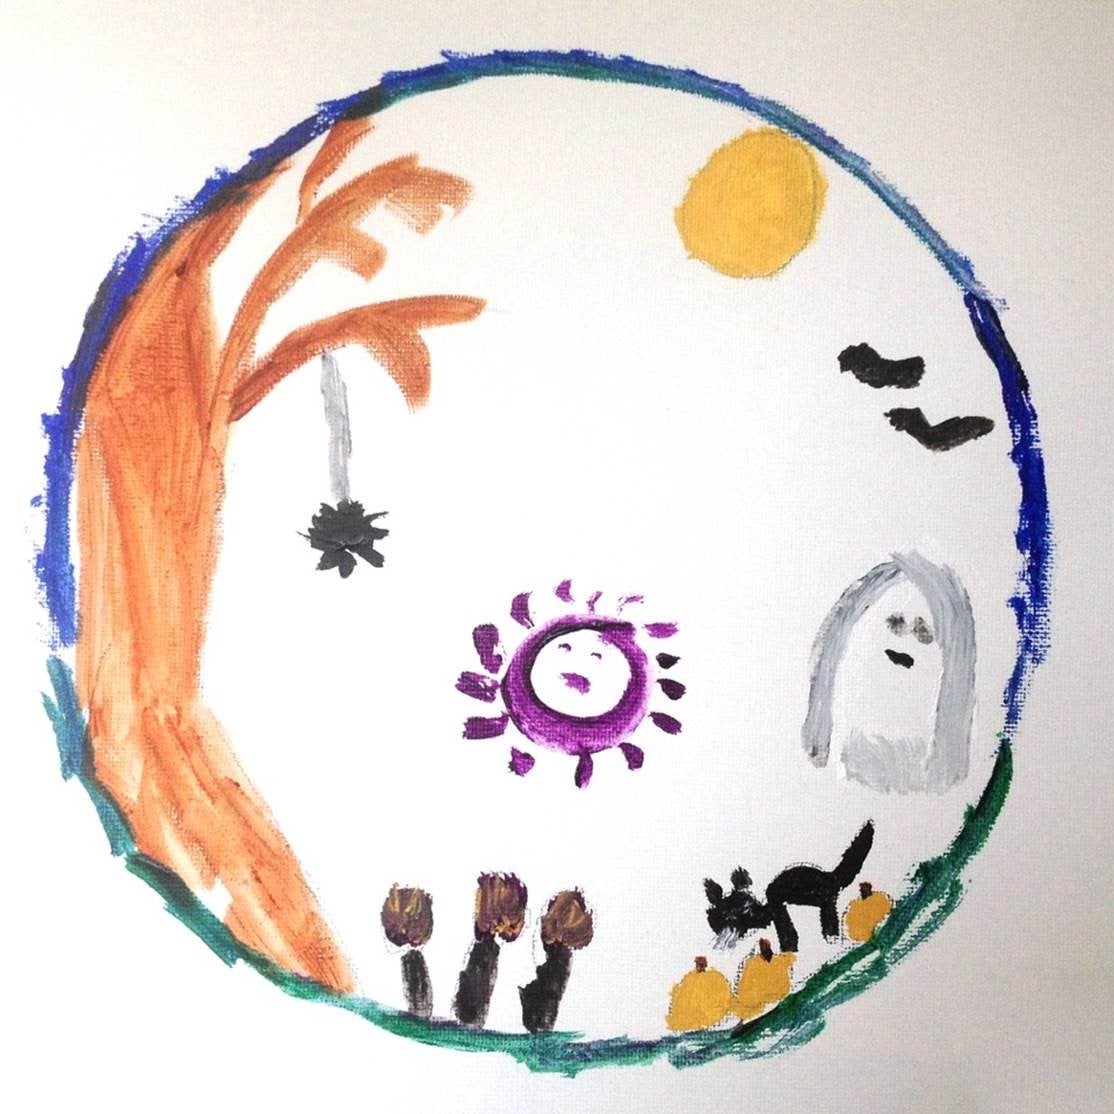
Mandala
Mandala is the Sanskrit word for “circle.” They offer a safe space in which to create. Art therapists use mandalas in a number of ways to help clients relax, communicate, inspire self- awareness and to find meaning.
Following are simple guidelines for creating mandalas, which you can do individually and/or with partners, family and friends.
Supplies (Gather all items before you begin the instructions):
- Circular object like a plate, bowl, jar, lid, etc. The size of your object will be the size of your mandala.
- Paper/Surface – computer paper, colored paper, card stock, cardboard boxes cut into squares, cereal, pages from newspapers and magazines, etc. Chose any surface you can draw, paint or even mold or carve. The sky is the limit.
- Colored or regular pencils, pens, markers, color crayons, acrylic paint, watercolors, charcoal. Some people enjoy adding found objects to their mandalas, for example, buttons, stickers, fabric swatches, tissue paper cut up or yarn. You get the idea.
- Glue, tape and scissors if you decide to go beyond the drawing.
- Music – it can be fun and relaxing to put on music during the art making process. Music with no words often is better so your mind is free to create without attaching to the external words.
Instructions:
- Setting – get comfortable, preferable at a table, but it’s also fine to sit on a pillow on the floor with a hard surface for creating on and surrounded by your supplies.
- When you’re settled and ready to being, start by closing your eyes (if your comfortable, otherwise keep them open) and take a deep, slow breath. Feel yourself beginning to relax. Do it again. (If you want to incorporate a full meditation into your mandala practice, now is the time. But it’s not necessary. This is YOUR mandala and whatever is more comfortable for you is how you proceed.)
- After at least three deep in and out breaths, open your eyes and reach for your circular object. Place it on your paper wherever you want and trace it. Go with your “gut.” If you usually always chose green, but your instinct is saying “orange,” pick up the orange. Don’t worry if you don’t do it “perfectly.” However it comes out is the ways it’s supposed to be.
- Here comes the fun and therapeutic part. Just start filling in your mandala, or if you so chose work on the outer spaces of your circle or both.
- The ONE rule: No one is allowed to say or think, “Mine is ugly” or “I am bad at this,” etc. Give yourself this gift. If necessary, go beyond your comfort zone and just create. This is the time to put on the music if you want.
- When you finish your mandala, give it a title, date and signature. You are the artist. Sign your art however you want, for example with your full name, initials, nick name or whatever feels comfortable.
- If you’re alone, take time to look at your mandala and see think about what it means to you. If you’re in a group, you can share your mandalas and what they mean to you with each other. Very important never to force anyone to share if they don’t feel comfortable.
Your mandalas will speak to you if you let them. Put them up where you can see them, or if private, tuck them in a journal or nightstand. Families can put them up on a wall together and stand back and look at them as a whole. This is a great communication tool. Individuals can also make one a day, as did the great psychologist Carl Jung, who believed that mandalas could help people see into their own psyches.
Most important: Relax, open your mind to the healing qualities of the art making, let your creative juices flow and have fun!
***Share your mandala with others. During these times of isolation, we all need to connect. Here are some ways to use your mandals for emotional and spiritual connection while keeping social distance.
- Fold your paper into twos or fours and create a card, or cut your card stock so it can be folded and fit into an envelope. Following all of the coronavirus precautions you could send your card to grandparents, family members and friends near and far.
- Electronic method. Photograph or scan your mandala and text or email it to your loved ones. You could also post it on social media to entertain and inspire others to create their own art.